

Creating and editing contacts
A contact is either a person or an organisation — a gallery, an art centre, a foundation or a company. A person can belong to one organisation at a time, and former workplaces are kept.
The screenshots show heyArtist in Danish; the labels are named in English here as they appear when you switch the app to English.
Create a contact
Section titled “Create a contact”- Click Contacts in the menu.
- Click New person or New organisation.
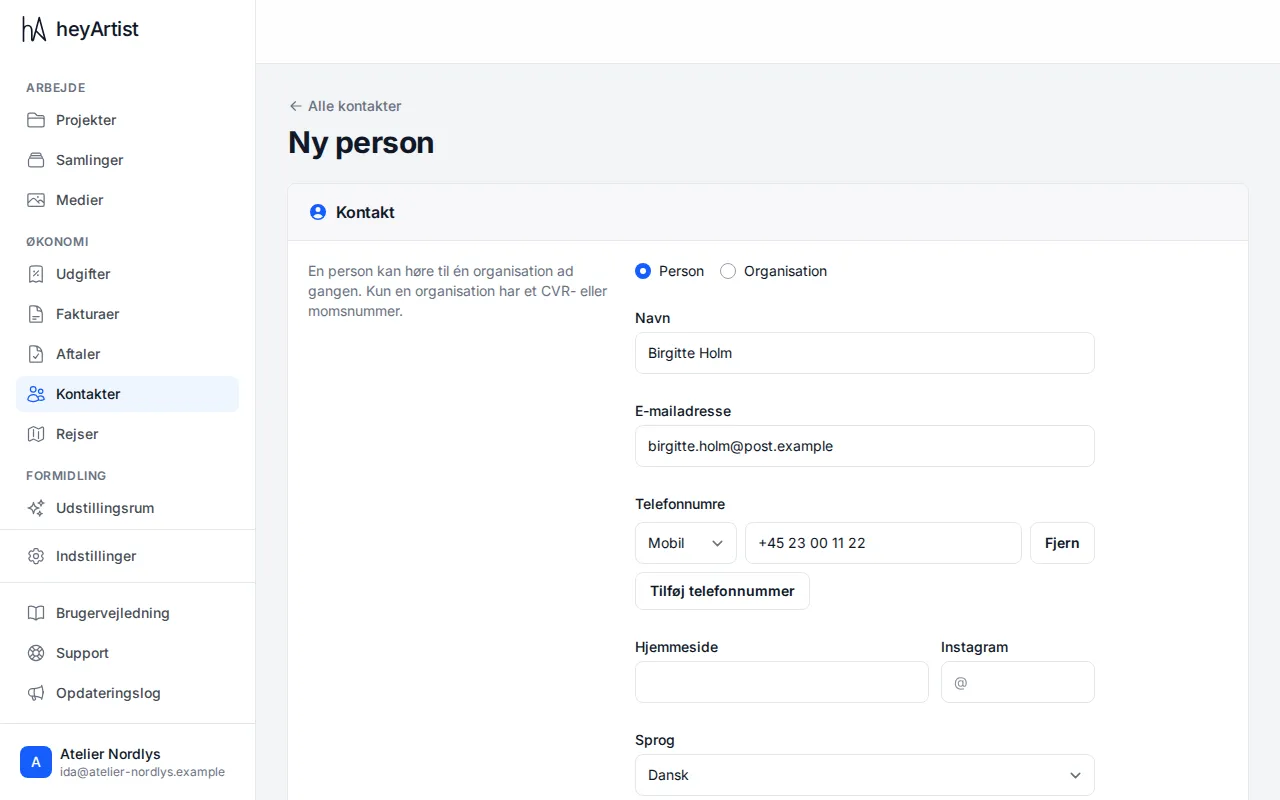
- Fill in what you have. Only the Name is required.
- Click Save at the bottom.
The form is divided into boxes with a short explanation on the left:
- Contact — Person or Organisation, name, email and phone numbers. Click Add phone number for each number and choose its type: Mobile, Home, Work or Other. Plus website and Instagram.
- Language — Danish or English. New invoices and contracts to the contact start in that language.
- Organisation (people only) — where the person works now, and their job title. Pick an organisation from the list, or New organisation … to create it at the same time.
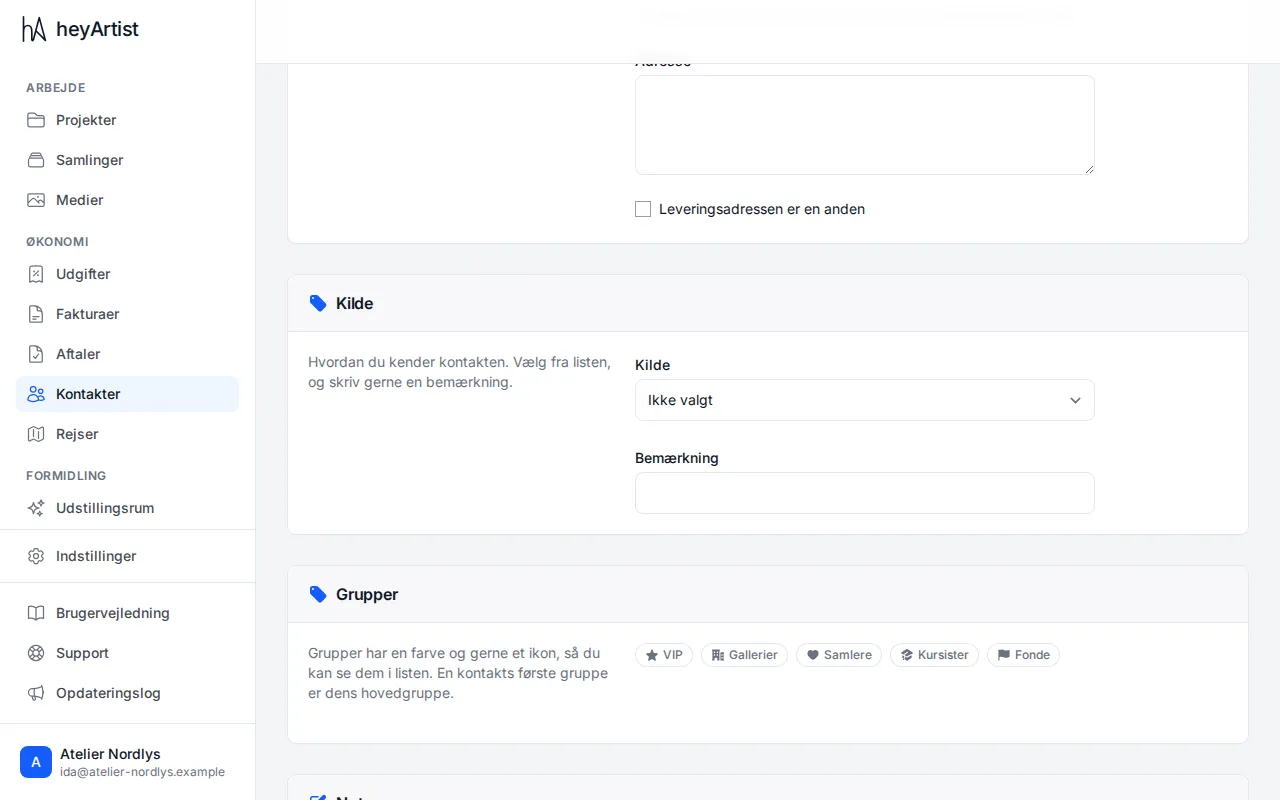
- Billing information — country code, address and, for an organisation, CVR or VAT number. Country and VAT number decide which tax treatment heyArtist proposes on an invoice. Tick The delivery address is different to enter a separate delivery address, such as a summer house.
- Source — how you know the contact, such as Fair, with a note like Art Herning 2025.
- Groups — click groups on and off. The first one you pick becomes the main group and gives the contact its colour.
- Notes — for you only. They never appear on an invoice.
If another contact has the same email or phone number, you are asked before anything is saved. See Duplicates and merging.
The contact’s page
Section titled “The contact’s page”Click a contact in the list to see everything about it on one page.
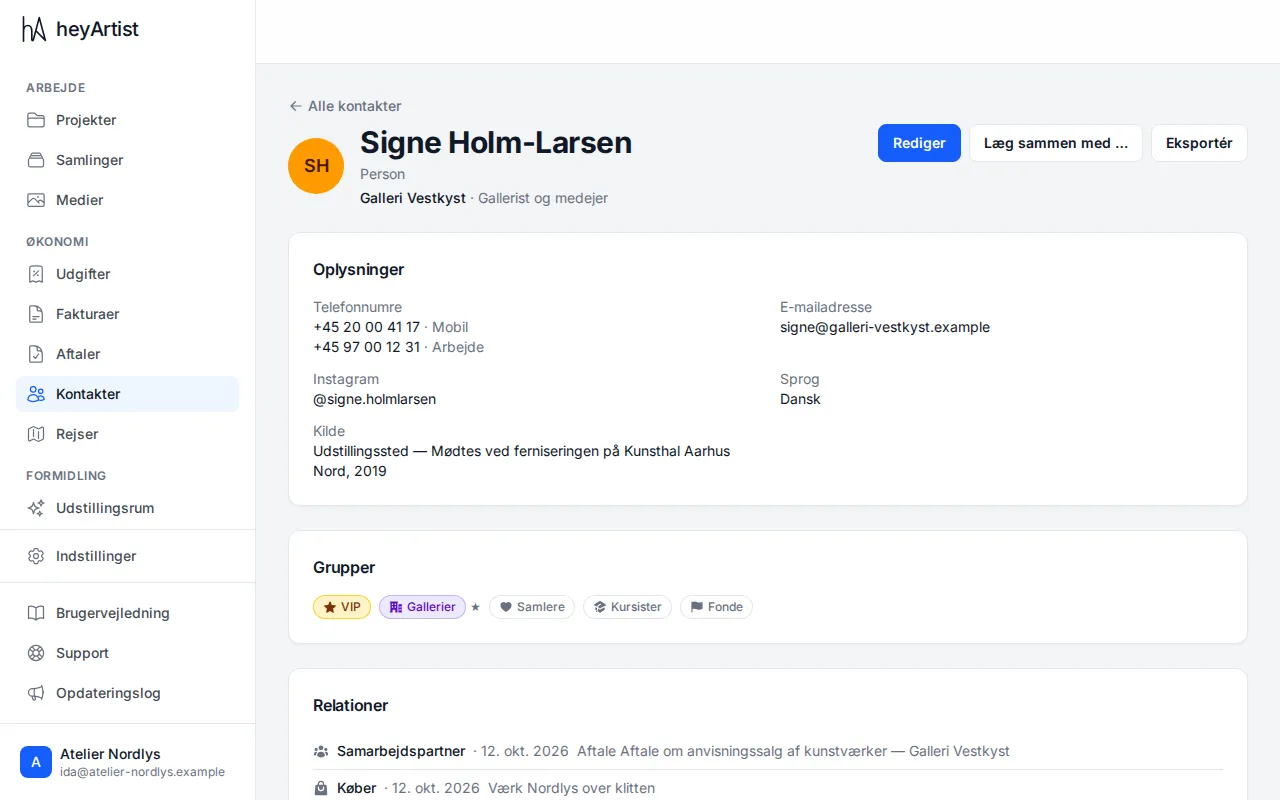
At the top are the name, the type and the organisation the person belongs to now. The buttons Edit, Merge with … and Export are on the right. Below:
- Details — phone numbers, email, Instagram, language, source and notes.
- Groups — click a group on or off right on the page. See Groups and sources.
- Relations — see below.
- Organisations or People — see below.
- History — notes, invoices, contracts and sold works on one timeline.
- Delete contact — at the bottom. See Exporting and deleting a contact.
Click Edit to change the details. It is the same form as when creating the contact.
Organisations and people
Section titled “Organisations and people”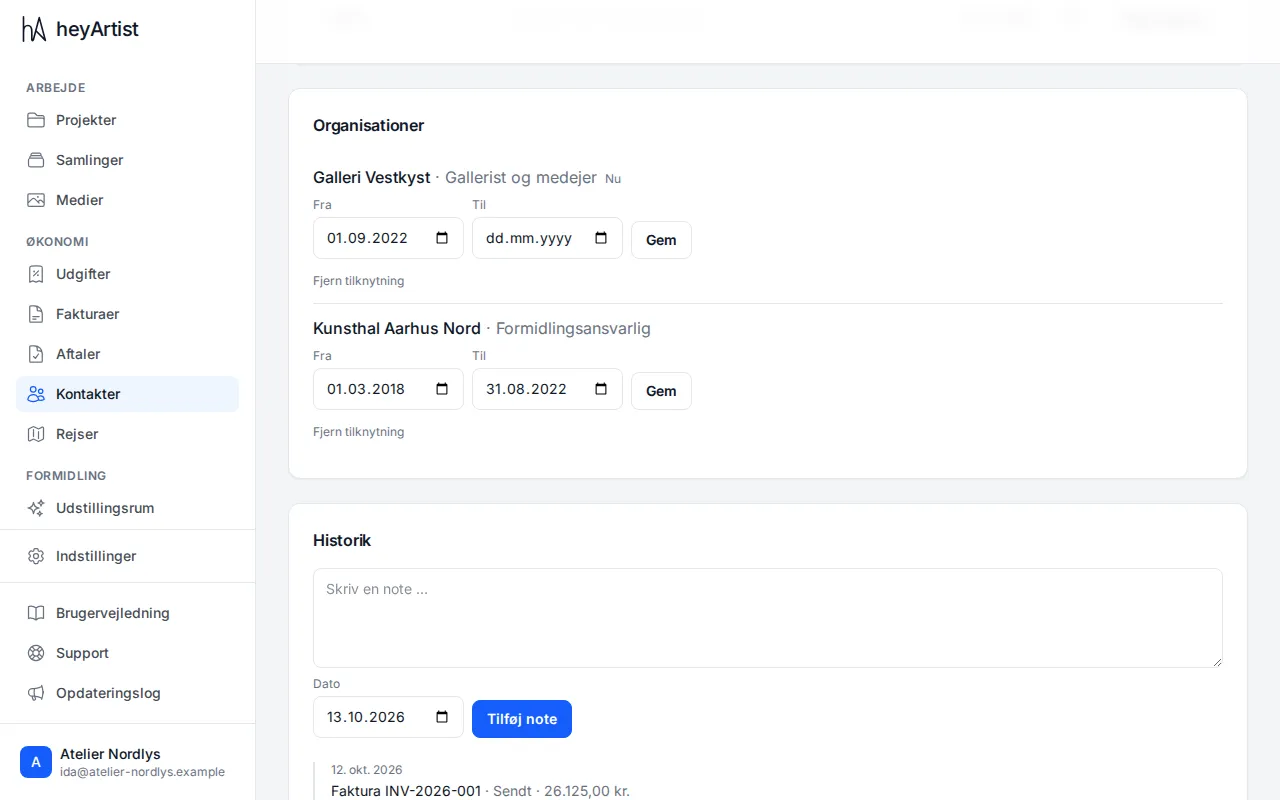
On a person, Organisations shows the organisation they are with now (marked Now) and former ones, with job title and From and To dates.
- If the person changes workplace, pick the new organisation under Edit. The old one is kept with an end date.
- Correct the dates and click Save next to them.
- Click Remove affiliation to delete an affiliation that was wrong. Both the person and the organisation stay where they are.
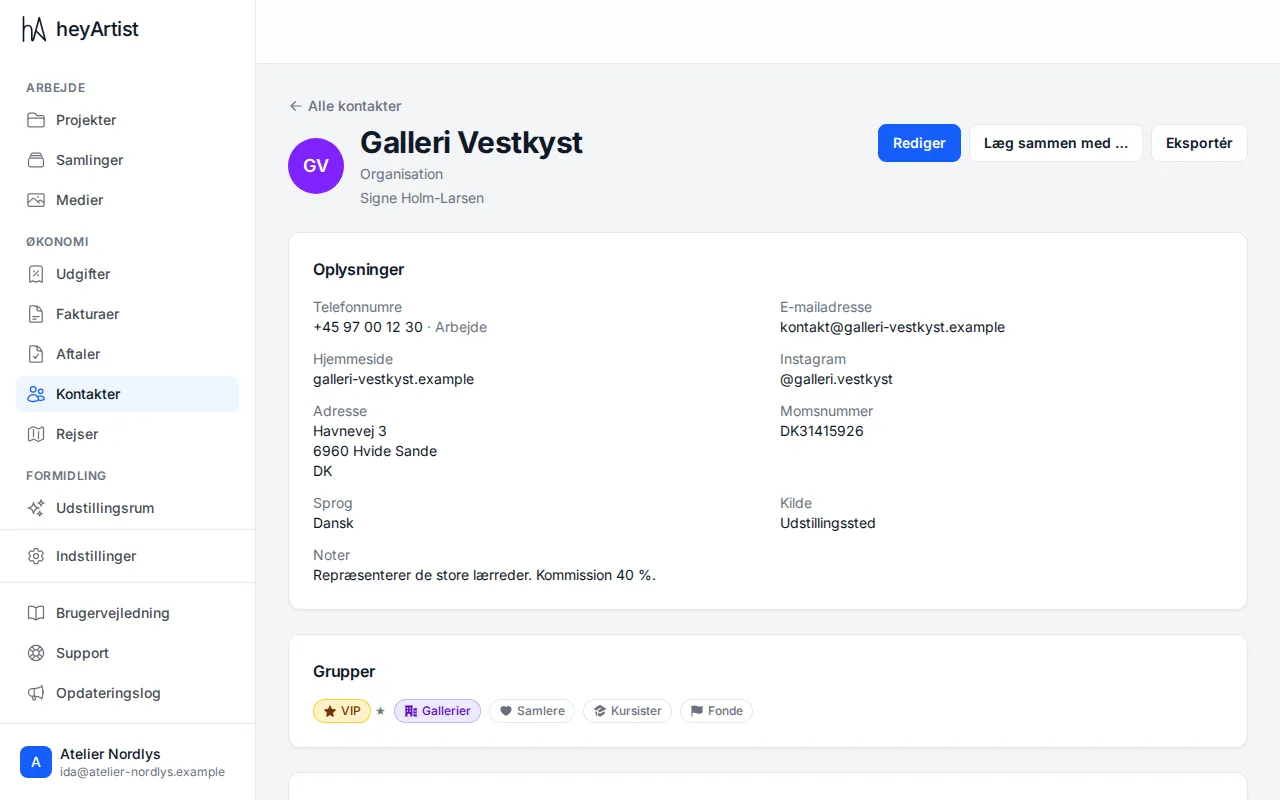
An organisation also has a website, an address and a VAT number. Instead of Organisations it has People: those who work there now, and those who have.
When you make an invoice or a contract for a person at an organisation, you can address it to the organisation with the person as “Att.”. See Making an invoice and The nine agreements.
Relations
Section titled “Relations”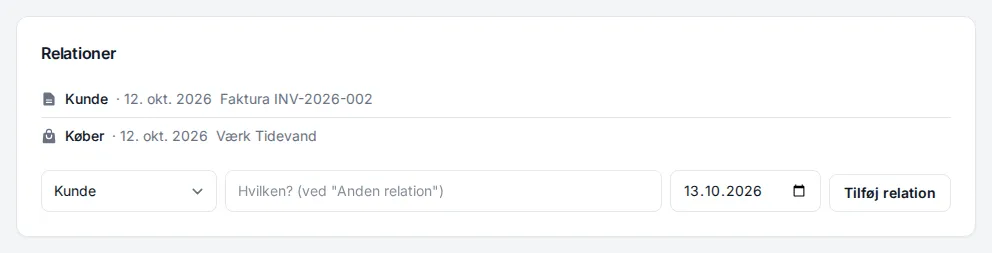
Relations shows what the contact is to you, with a date and what created the relation:
- Customer — from an issued invoice.
- Buyer — from a sold work.
- Collaborator — from a signed contract.
You can add a relation yourself: choose Customer, Buyer, Collaborator, Course participant or Other relation (then type which, such as Mentor), pick the date, and click Add relation. A relation you added yourself can be removed again with Remove. Relations from invoices, contracts and works follow what they came from and cannot be removed by hand.
History and notes
Section titled “History and notes”Under History you write a note, about a studio visit or a phone call, for example. Write the note, pick the Date — change it if it happened on another day — and click Add note.
The history shows your notes together with the contact’s invoices, contracts and sold works, newest first. Click an invoice or a contract to open it.